
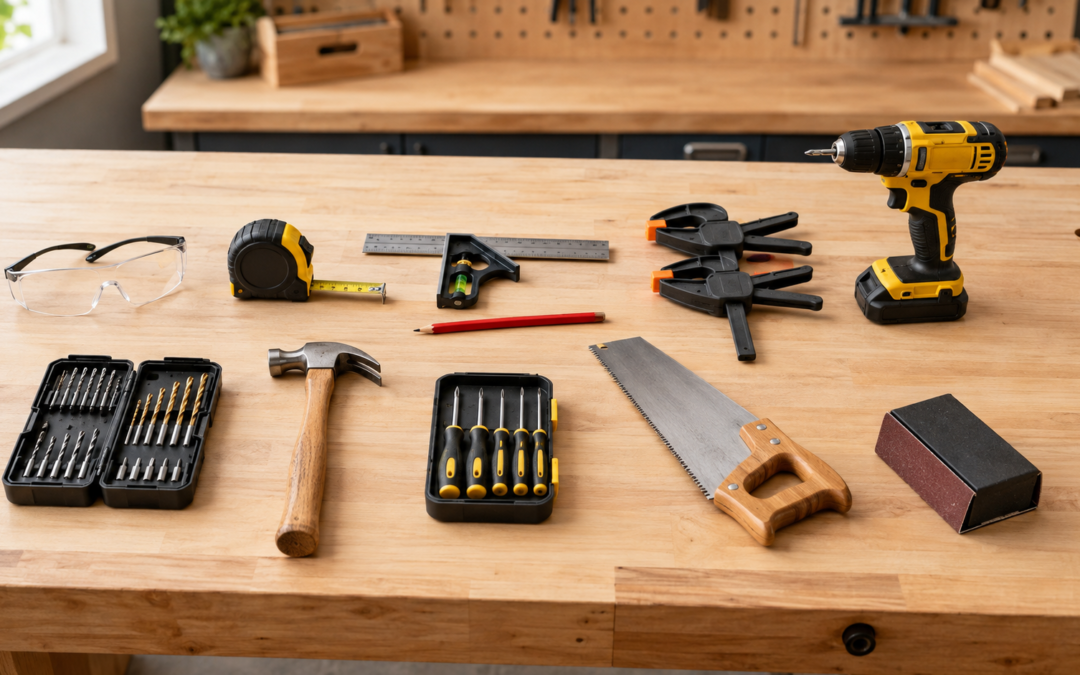
Buy slowly. Start with the tools needed for one project, learn how to use them, and add equipment when a repeated task justifies it.
1. Safety Glasses
Eye protection belongs at the top of the list. Cutting, drilling, sanding, and hammering can produce dust, chips, or flying particles. Select properly fitting protection suited to the task and wear it consistently.
2. Tape Measure
A 16- or 25-foot tape is adequate for most small projects. Choose one with readable markings and a reliable lock. Practice reading common fractions before making project cuts.
Do not switch among several measuring tools during the same layout unless you have compared them. Small differences can create fitting problems.
3. Combination Square or Speed Square
A square helps you mark straight crosscut lines, check 90-degree corners, and test whether an assembly is square. A combination square is versatile for smaller work; a speed square provides a broad edge that is easy to hold against dimensional lumber.
4. Marking Pencil
A standard carpenter’s pencil is durable, while a sharp mechanical pencil can make fine layout lines. The important habit is marking consistently and indicating the waste side of every cut.
5. Clamps
Clamps act like extra hands. Start with at least two medium bar clamps or trigger clamps, then add smaller clamps as projects require them. Pads or scrap wood can help prevent clamp faces from denting a finished surface.
Clamps hold work; they do not correct a bad fit. Dry-fit the parts first and avoid excessive pressure that bows the assembly or squeezes out nearly all the glue.
6. Drill/Driver
A cordless drill/driver can drill pilot holes, countersink screws, and drive common fasteners. A modest model is sufficient for many beginner projects. Learn how the clutch settings work so you can reduce stripped screw heads and overdriven fasteners.
Keep long hair, loose clothing, and jewelry away from rotating parts. Remove the battery or unplug the tool before changing or adjusting accessories when the manufacturer instructs you to do so.
7. Drill and Driver Bits
A small set of common drill bits and driver bits is more useful than a large collection of rarely used sizes. Match the driver bit precisely to the screw. A poor fit damages both the bit and screw head.
Consider a countersink bit after you understand ordinary pilot holes. It can help screw heads sit neatly below or level with the surface.
8. Hammer
A general-purpose claw hammer handles small nails, light assembly, and nail removal. Let the tool do the work rather than swinging harder than necessary. Start the nail with controlled taps and keep your free hand away once it stands securely.
9. Screwdriver Set
Manual screwdrivers provide control for installing hardware and making final adjustments. Include common Phillips and slotted sizes. Using the correct size reduces slipping and damaged fasteners.
10. Handsaw or Jigsaw
A quality handsaw is inexpensive, portable, and appropriate for many straight cuts with patience and practice. A jigsaw can make straight or curved cuts, but the blade may wander if the tool is forced.
Whichever option you use, support the board, clamp it securely, keep the cutting path clear, and follow the manufacturer’s operating instructions. Allow the blade to stop fully before setting down a powered saw.
11. Sanding Block or Random-Orbit Sander
A sanding block keeps hand sanding flat and controlled. It is inexpensive and works well on small projects. A random-orbit sander speeds larger jobs but creates more airborne dust and noise.
Beginners can start with a sanding block and a small selection of grits. Add a powered sander when project size makes it worthwhile.
12. Work Surface and Sacrificial Board
A stable surface is a tool. It should support the project without rocking or collapsing. Place scrap material below a workpiece when drilling or cutting so you do not damage the bench and can reduce breakout on the underside.
Helpful Tools to Add Later
A small level, brad-point drill bits, a countersink, additional clamps, a rubber mallet, and a shop vacuum may become useful. Buy them in response to a real task instead of treating a long tool list as an entrance fee.
Advanced stationary tools can wait. If a plan requires equipment you do not own or have not learned to operate, choose pre-cut materials, ask a qualified supplier about cutting services, or select a different plan.
A Sensible Buying Order
First buy eye protection, measuring and marking tools, and clamps. Add the cutting and drilling tools required for your chosen project. Buy sanding supplies before assembly is complete, and purchase finish only after deciding where and how the project will be used.
Whenever possible, handle a tool before buying it. Check whether controls are easy to reach, instructions are available, replacement blades or bits are common, and the tool feels balanced in your hands.
Frequently Asked Questions
Should a beginner buy cordless or corded tools?
Either can work. Cordless tools offer portability; corded tools avoid battery limits. Base the choice on your workspace, typical project size, and access to outlets rather than assuming one is always better.
How many clamps do I need?
Two can start a small project, but most woodworkers gradually add more. Buy the lengths and styles required by your actual projects.
Should I buy a large tool kit?
Not automatically. Kits can offer value when they contain tools you will use, but an impressive piece count is not useful if many items duplicate one another or do not fit your projects.